Oracle Database 11gR2 Windows 64-bit Installation Steps
- Download Oracle Database installation zip binaries from the Oracle website.
- Go to the Oracle website, database/enterprise-edition/downloads page. Or Click Here!
- Search for Oracle Database 11g Release 2, Microsoft Windows (x64).
- You will see 2 files, File1 and File2.
- Download both of them (approx 2.06 GB).
- Extract the below downloaded zip files into respective folders.
- win64_11gR2_database_1of2.zip
- win64_11gR2_database_2of2.zip
- Now copy and paste /(merge) the contents of second unzipped folder into the first unzipped folder.
- No. you can't. It doesn't work like that, even if you merge the folders after the error prompt. The error msg won't disappear. So save yourself some time and perform this step in advance.
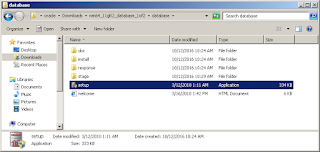
- Execute the “setup.exe” file which is located in the “/database” folder of the first extracted zip file.
- “Setup.exe”, right click, run as administrator.
Fig 1.1 Oracle Database 11gR2 Win64 Installation - Setup - Click yes on the "User Account Control" screen.
Fig 1.2 Oracle Database 11gR2 Win64 Installation - User Account Control - Wait for the setup to build and initialize.
Fig 1.3 Oracle Database 11gR2 Win64 Installation - Building Flow - Installation Steps (Total 9 steps)
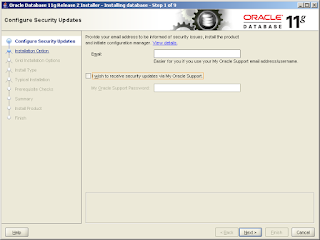
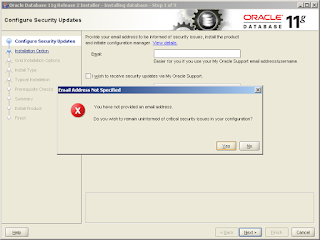
- Step 1 of 9 - Configure Security Updates
- Unselect “I wish to receive security update..” and click next.
Fig 1.4 Oracle Database 11gR2 Win64 Installation - Configure Security Updates - Click yes on the "Email Address Not Specified" screen.
Fig 1.5 Oracle Database 11gR2 Win64 Installation - Email Address Not Specified - Step 2 of 9 - Select Installation Options
- Select “Create and configure a database”.
Fig 1.6 Oracle Database 11gR2 Win64 Installation - Select Installation Option - After this step, Total steps will change to 8.
- Step 3 of 8 - System Class
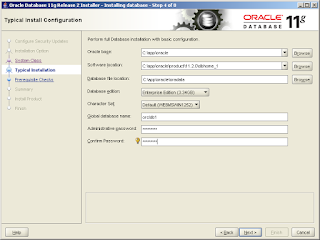
- Step 4 of 8 - Typical Installation Configuration
- Enter “orcldb1”(or any name) as the “Global Database Name” for the new database.
- Enter “sysAdmin1”(or any password) as “Administrative Password” for sys/system database privilege.
- Confirm the same password again.
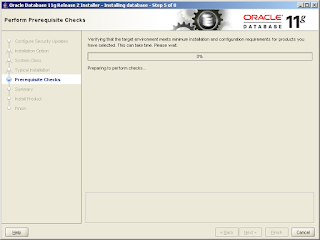
Fig 1.8 Oracle Database 11gR2 Win64 Installation - Typical Install Configuration - Step 5 of 8 - Perform Prerequisite Checks
- Installation will automatically checks if the prerequisites are met.
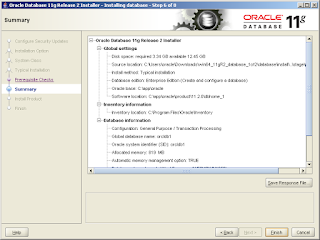
Fig 1.9 Oracle Database 11gR2 Win64 Installation - Perform Prerequisite Checks - Step 6 of 8 - Summary
- Step 7 of 8 - Install Product
- Wait for the installation to finish, grab a cup of coffee meanwhile (approx 12 mins).
Fig 1.11 Oracle Database 11gR2 Win64 Installation - Install Product - Click on “Allow access” button on Windows Security Alert screen (2 times) .

Fig 1.12 Oracle Database 11gR2 Win64 Installation - Windows Security Alert - Database Configuration Assistant will now create and start Oracle instance (approx 10 mins).

Fig 1.13 Oracle Database 11gR2 Win64 Installation - Database Configuration Assistant - Click on “OK” button on the Database Configuration Assistant Summary page.
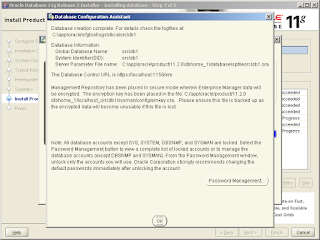
Fig 1.14 Oracle Database 11gR2 Win64 Installation - Database Configuration Assistant Summary - Step 7 of 8 - Finish
- Verify your installation
- Open a new SQL session by clicking on “SQL Plus” from Start menu, Oracle - home, Application Development. (Or you can also open it from the command line by typing the command sqlplus)

Fig 1.16 Oracle Database 11gR2 Win64 Installation - Verification - Enter “system” as username and enter the Administrative password you entered earlier during installation.

Fig 1.17 Oracle Database 11gR2 Win64 Installation - Sql Cmd Prompt - Enter the script “select * from global_name;” on the “SQL>” prompt.
- Result “ORCLDB1” verifies the installation.

Fig 1.18 Oracle Database 11gR2 Win64 Installation - Verified
Is merging really necessary? Can't I give the location while installing when prompted?





No comments:
Post a Comment